

 Free gifts with orders of €150 or more



 Loading...
What do you record before the first blow of the hammer?
The most expensive moment of a renovation is the argument afterwards about who made the scratch. You do not win that argument with a good memory but with a record, and that costs you half an hour before anyone sets foot inside.
Photograph the existing floor
Photograph every room before work starts, including the damage that is already there. Capture the floor room by room, plus close-ups of anything that was not perfect to begin with: an existing dent by the door, discolouration by the window. Make sure the date sits in the file data. Without a baseline, every mark afterwards is arguable – including the ones that were already there.
Put in writing who protects what
Most disputes arise because nobody raised the subject. Agree before the start who supplies the floor protection, who lays it, who renews it between trades and who removes it at the end. Include the route: which door the trades use, where materials are stored, where cutting happens. This belongs in the quotation or the order confirmation, not in a text message.
Who is liable for damage to the floor?
That depends on what was agreed and on who causes the damage. If you work with a main contractor, they are in principle responsible for damage their people cause – but only where it can be shown the damage occurred during their work, which is exactly why the baseline photos matter. If you do the work yourself or engage individual trades, responsibility shifts to you as the client. Also check whether your buildings or contents insurance covers renovation damage: many policies exclude damage during building work or attach conditions. We are not legal advisers, so on a larger project have this point checked by your insurer or adviser – but in every case put the agreements in writing.
Check the rules of your building management or landlord
In an apartment block there are often additional requirements: protection of the communal stairs and hallway, permitted working hours, use of the lift, and sometimes a mandatory acoustic underlay for hard flooring. Ask for these before the materials arrive. Damage in a communal stairwell is recovered from the resident who commissioned the work, regardless of who exactly walked there.
Floor protection by build phase
Every phase of a renovation brings a different risk, and therefore a different measure. The table below gives the biggest risk per phase and the protection that goes with it. If you first want to know what the differences between cardboard, felt, non-woven and film actually mean, read our guide on which floor protection you should choose.
| Build phase | Biggest risk to the floor | Measure | Material |
|---|---|---|---|
| Strip-out and demolition | Rubble, shards and dropped tools; point load from wheelbarrows | Heavy, load-spreading layer along the whole removal route | Cardboard runner, doubled on the wheelbarrow route |
| First fix and services | Drilling dust, metal swarf and oil marks from tools | Absorbent, oil- and grease-resistant run; sweep daily | Non-woven runner along the route |
| Plastering, levelling and spraying | Large volumes of water and plaster; seams opening up | Moisture barrier across the full width, absorbent walkway on top | Construction sheeting underneath, non-woven above |
| Second fix, joinery and kitchen install | Dragging heavy units and appliances; sawdust under the protection | Renew the protection now rather than lift it; pads under tilted units | Felt runner, cloth under the cutting station |
| Painting | Drips and overspray; edges curling at the skirting | Anti-slip run that stays put; skirtings and edges taped separately | Felt runner with PE coating, masking tape |
| Handover and final clean | The last dragging and traffic damage after the protection is up | Lift the protection only once the last heavy work is done | Self-adhesive film along the route until the keys change hands |
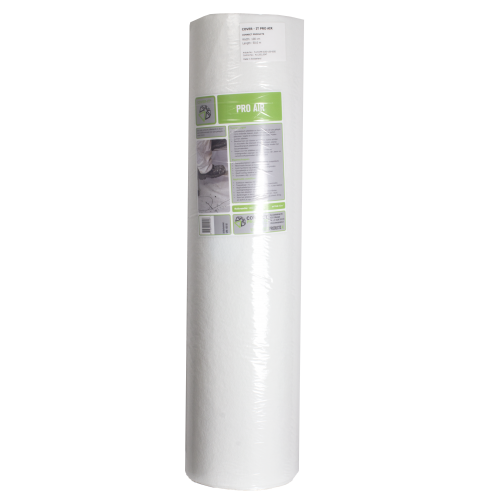
per 1 Pieces
 Breathable membrane For fresh floors 50 m² per roll

per 1 Pieces
For hard/lacquered floors Self-adhesive, no residue 42 m² per roll 
per 1 Pieces
For small jobs Anti-slip layer Good protection 
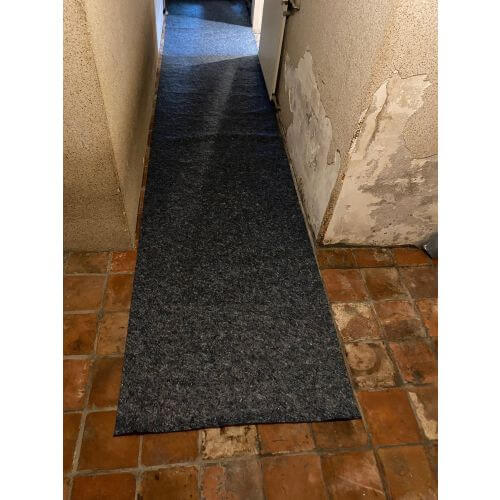
per 1 Pieces
For soft and hard floors 240 g/m² felt 10 m² per roll 
per 1 Pieces
25 cm wide Glass protection UV-resistant per 1 Pieces
50 m² per roll Glass protection Long-lasting use 
per 1 Pieces
Self-adhesive on carpet Anti-slip and liquid-tight 42 m² per roll 
 Liquid-tight and anti-slip Soft and hard floors 50 m² per roll


per 1 Pieces
280 g/m² runner Moisture- and wear-proof FSC, 100% recyclable 
per 1 Pieces
Floor protection Different surfaces 50 m² per roll Strip-out: doubling up is not excessive here
Removing rubble means a wheelbarrow carrying hundreds of kilos crossing the same metre of floor dozens of times a day. Put a second layer of floor protection along that route. Also guard the corners of door frames and walls with plastic corner protectors: most strip-out damage is not in the floor but on the corner the wheelbarrow clips.
First fix: watch what leaks
Plumbers and electricians bring oil, drilling grease and coolant with them. Those are stains that soak into a porous floor and never come out. An absorbent non-woven run such as Cover-it® Super matters more here than thickness, precisely because it holds oil and grease rather than smearing them. Sweep daily too: drilling dust that works its way under a run abrades with every step.
Plastering and levelling: two layers, two jobs
This is the wettest phase. Work with a base layer of construction sheeting that holds the moisture back and an absorbent run on top where people walk. Sheeting alone is not enough – it turns treacherous the moment water sits on it. With two layers the overlap and the taping of seams become critical; how to handle that is set out step by step in how to lay floor protection correctly.
Second fix: the phase where it goes wrong
This is where the real risk sits. The room is clean, the work looks nearly done, so the protection gets lifted or not replaced. Meanwhile the heaviest and sharpest items are coming in right now: a worktop, a built-in oven, a dishwasher on its side. Renew the protection at the start of second fix instead of removing it: a felt runner of 25 metres covers most domestic routes in a single run. Use loose pads under the corner of a unit you tilt, such as the cloth of 1 x 1 metre.
Painting and handover
In the painting phase it is about drips and about edges. A run that stays put without taping works best here, backed up with masking tape along the skirtings. Only lift the protection once the cleaning and the last material removal are done. The temptation to show off the finished floor early is strong – that is exactly the moment somebody carries a ladder across it.

per 24 Pieces Professional masking tape Strong quality Affordable price
per 1 Pieces XL: 25 m² per roll 240 g/m² felt Soft and hard
per 1 Pieces Self-adhesive on carpet Anti-slip and liquid-tight 42 m² per roll 
per 120 Pieces For edges of 25-35 mm 120 strips of 200 cm per box Versatile mid-range size

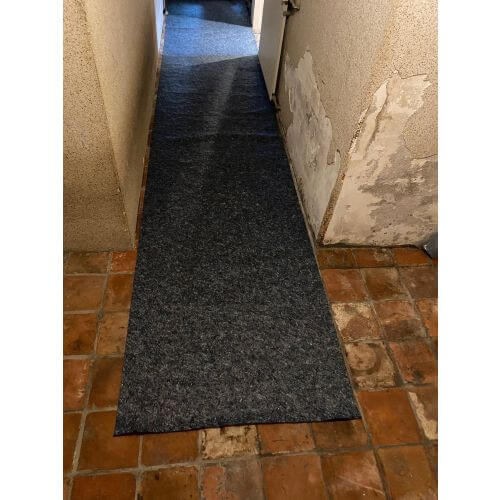
The rest of the house: where the dust goes
Construction dust travels much further than people expect. Without measures there is a grey film in the bedroom at the other end of the house within a week. And that dust is not harmless: it contains sand and plaster particles that act as an abrasive on any floor somebody walks over.
The route and the front door
Run the protection beyond the work area: from the front door, along the hallway, into the work zone. A short run by the door is not enough, because the dust on the soles comes off ten metres further in. Add a walk-off zone or an old mat on top of the protection at the front door.
Stairs and landing
On a staircase, loose protection does more harm than good: it slides, curls and causes falls. Use self-adhesive covering film here, which fixes itself and follows the shape of the tread. Do not forget the handrail – it takes as much punishment as the treads when material is carried up, and a strip of protective film wraps it in seconds.
Dust screens and sealed doorways
Closing a door does not stop the dust; the gap underneath is the motorway. Seal doorways with a sheet of construction sheeting 400 cm wide taped all round, or fit a zipped access if people need to pass through. In adjoining rooms, cover the furniture with tarpaulins or furniture covers, and use moving blankets for anything put into storage. Whatever you clear out temporarily travels most easily in moving boxes.
Communal areas in an apartment block
In a block of flats the route also runs through the lobby, the lift and the stairwell. Protect those exactly as you would your own home. For the lift that means the floor and the walls: a felt runner on the floor, protective film or blankets against the wall panels. Notify the building manager as well, so the cleaning contractor does not remove the protection.
 2 blankets + 2 straps Secured without tape Ideal for a single item

per 1 Pieces Individually packed Good protection Also for other objects 
per 1 Pieces 3 x 4 m (12 m²) 140 gsm, with eyelets Weather- and water-resistant 
per 1 Pieces 400 cm wide, 50 m/roll 100% recycled PE Natural, keeps visibility


Living on site
Can you stay in the house during the work?
Often yes, provided you divide the house into zones. Designate one dust-free zone – usually a bedroom and the bathroom – that stays behind a sealed doorway and sees no site traffic. All other rooms count as work zone with protection. Make sure the trades' route does not pass through the dust-free zone; where that is unavoidable, moving out for the heaviest weeks is usually cheaper than the clean-up afterwards.
Children, pets and loose edges
A curling edge of floor protection is the most common trip hazard in an occupied renovation. Check the edges by the doors daily and fix them down again. In an occupied house, choose material with an anti-slip underside rather than loose film, and use tape in a signal colour for the edges: it marks the transition at a glance. Pets will also happily burrow under a loose run, so tape it down on all sides.
Cost in proportion
What does floor protection cost compared with repair?
Work it out per square metre. A roll of floor protection covers the route of an average renovation for something in the order of a few tens to a good hundred euros, depending on material and area. Sanding and resealing a wooden floor, or replacing one damaged board in a laid floor, runs to a multiple of that – quite apart from the days the room is out of use. The ratio is rarely worth debating; the reason people skip it anyway is not the price but the planning.
Should you protect the floor if it is coming out anyway?
Often yes, for two reasons. First, the subfloor or screed usually stays, and damage to it has to be levelled out again before the new floor goes down. Second, the old floor rarely comes out in week one: until then you are walking on it, and a cracked tile or a loosened board only makes the strip-out harder later. If the floor comes out in the first days, a cheap layer along the removal route is enough.
Checklist for your renovation
- Beforehand: dated photos of the existing floor, agreements in writing, building or landlord rules requested.
- Route: protection from the front door into the work area, not just in the work area itself.
- Per phase: adjust the protection at every change of trade, do not leave it for six weeks.
- Dust: seal doorways, cover adjoining furniture, sweep daily.
- Vertical: include corners, frames, handrail and lift walls, not just the floor.
- Finally: lift the protection only after the last material removal and the final clean.
Everything for your renovation at Kortpack
From floor covering and floor protectors to the rest of our moving materials and the accessories you need along the way: order it all from stock in one go. Ordered on working days before 3:30 PM? Then your order will be shipped the same day. Enjoy free delivery on orders over €75 excl. VAT, which a full renovation kit usually reaches straight away.
Do you have questions about which size of floor protectors is best suited to your situation? Please don't hesitate to contact us — by phone on +31 184 – 614256, via info@kortpack.nl or via WhatsApp.
 Den Webshop auf Deutsch ansehen
 View the webshop in English
 Ver la tienda online en Español
 Voir la boutique en ligne en Français
 Visualizza il negozio online in Italiano
 Bekijk de webshop in het Nederlands