

 Free gifts with orders of €150 or more



 Loading...
Why double-sided tape holds on so stubbornly
Double-sided tape is not simply a strip with adhesive on both faces. It is an engineered product: a carrier with an adhesive layer on either side, and it is the combination of carrier and adhesive chemistry that decides how the tape behaves on removal. Understand that, and you know in advance whether the tape will lift in one clean length or come away in shreds.
The carrier decides whether the tape lifts in one piece
Across the double-sided tape range you will broadly meet four carriers, each with its own removal behaviour:
- Tissue carrier (thin paper): tears almost every time. Paper fibres and adhesive stay behind on the surface, so you work in two rounds.
- Film or PET carrier: barely stretches and lifts in one continuous length. This is the most forgiving type to remove.
- Cloth or scrim carrier with hotmelt: strong and tear-resistant, but hotmelt adhesive leaves more residue on porous surfaces.
- Foam carrier (common in mounting applications): the foam splits through its core, leaving a layer on both surfaces. By far the most follow-up work.
Why old tape is harder to remove than fresh tape
An adhesive builds its bond over time. Immediately after application it touches only the peaks of the surface; over the following weeks it flows further into the microstructure, increasing the contact area. Acrylic adhesives continue this process longest: modest initial tack, but the strongest bond after months. Rubber and hotmelt adhesives grab hard straight away, but harden and discolour under heat and UV – and it is precisely that hardened layer that leaves the gritty residue behind.
Is it actually tape underneath?
Before you start, check that you are not dealing with construction adhesive or sealant. Press gently against the edge with a fingernail or a plastic spatula: if it gives slightly and you feel a thin layer shifting, it is tape. If it stays rock hard, it is adhesive or sealant – and the methods below will not work.

per 8 Pieces
 Tearable by hand Strong adhesive power In stock


per 1 Pieces
Strong adhesion Variable adhesion Easy to remove 

per 1 Pieces
Tear by hand 50m per roll Hot melt adhesive 
 Double-sided adhesive Indoor and outdoor use Reliable

 Easy to use Universal application Quality guarantee
What to have ready before you start
Four simple items will get you further than an hour of tugging. Lay them out before you lift the first corner.
Do you need special tools?
No professional kit required. But do gather these four things: a hairdryer or heat gun on its lowest setting, a plastic spatula or an old bank card (never metal on paint, glass or plastic), absorbent cloths, and a suitable adhesive remover. If you are working with solvents or sharp edges, put on work gloves and ventilate the area. For foam tape behind a badge or trim strip, a length of fishing line or unwaxed dental floss is the best "tool" there is: you saw straight through the foam layer without ever touching the surface.
Protect what must stay put
Mask the edge of the work area with painter's tape or masking tape, so a slipping spatula cannot scratch and the remover cannot run onto adjacent work. On larger areas, lay a length of protective film underneath to catch drips.
The basic method: heat, angle, speed, residue
Whatever the surface, the job follows the same four steps. The order is not optional: skip step 1 and you double step 4.
Step 1: heat the adhesive, not the surface
Hold the hairdryer 10 to 15 centimetres away and keep it moving, roughly twenty to thirty seconds per hand's width. Aim for warm, not hot: if you can still comfortably touch the surface, the adhesive is soft enough. Heat lowers the viscosity of the adhesive so it stretches instead of tearing – and it is the tearing that leaves residue.
Step 2: lift a corner with plastic
Slide the plastic spatula flat under one corner of the tape. With a tissue carrier, free a few centimetres before you start pulling: the wider the leading edge, the smaller the chance the tape tears straight away.
Step 3: pull slowly, folded flat back on itself
This is the step where most damage happens. Do not pull the tape up and away from the surface; fold it back on itself so you are pulling almost parallel to the surface. At a steep angle the entire force acts as a wedge under the paint, wallpaper or film; at a shallow angle that same force is spread along the bond line. And pull slowly: adhesives are viscoelastic, so at high speed they behave stiffly and fracture, while at low speed they flow with the movement. A few centimetres per second is fast enough.
Step 4: tackle the residue last
First roll the remaining adhesive off dry with your thumb or a clean cloth. A surprising amount comes away like this, with no chemistry involved. Whatever is left, treat with a product suited to the surface – see the table below.
Specification table: the right approach per surface
| Surface | Heating | Tools | Residue remover | Absolutely avoid |
|---|---|---|---|---|
| Car paint (painted bodywork) | Yes, warm (approx. 40–50 °C) | Plastic spatula, eraser wheel, fishing line | Citrus- or petroleum-based remover, paint-safe | Metal blade, acetone, scouring pad |
| Glass and mirrors | Warm soapy water is enough | Glass scraper at a shallow angle | Methylated spirits, isopropyl alcohol, glass cleaner | Scraper on coated or tinted glass |
| Painted wall | Very sparingly, briefly and from a distance | Plastic spatula | As little as possible; roll off dry, then lightly damp | Solvent, sanding, forcing |
| Wallpaper | No | Fingers, very slow pulling | None (wallpaper is not moisture-resistant) | Water, heat, any upward pull |
| Plastics (ABS, PC, PMMA) | Yes, carefully | Plastic spatula | Isopropyl alcohol, diluted washing-up liquid | Acetone, thinner, nail polish remover |
| Painted or veneered wood | Yes, briefly | Plastic spatula | Furniture oil or citrus cleaner, dry immediately after | Prolonged exposure to water |
| Stainless steel and bare metal | Yes, more latitude here | Plastic or wooden scraper | Methylated spirits, isopropyl alcohol, white spirit | Steel wool on brushed stainless steel |
| Powder-coated metal | Yes, warm | Plastic spatula | Citrus-based, then wipe down with soapy water | Aggressive degreasers |
Why always test on an inconspicuous spot first?
Because a surface does not show you how it will react. The same remover that leaves car paint untouched can dull a painted kitchen front or make a printed logo bleed. Apply the product to a hidden corner, leave it for a minute, wipe it off and judge gloss and colour before treating the whole area.
Removing double-sided tape from a car
On a car, double-sided tape usually sits under trim strips, badge lettering, spoilers, wind deflectors or advertising graphics – nearly always high-tack foam tape, because it has to survive years of weather. That is exactly what makes it difficult: the foam splits through its core as you pull.
What temperature is safe for car paint?
Work warm, in the region of 40 to 50 °C at the surface. Modern waterborne paints with a clear coat handle that without trouble – a car parked in full sun gets warm quickly. What you must not do is hold a heat gun on a high setting over one spot: locally you then exceed the temperature at which the clear coat softens, and your spatula presses a mark straight into it. Keep moving, always.
Saw foam tape through instead of tearing it off
Warm the component, stretch a length of fishing line between both hands and saw it through between the part and the paintwork. The part comes away without any prying; the foam layer stays behind on the paint. Remove that afterwards with an eraser wheel (a rubber disc on a drill, at low speed) or with your thumb in small rolling movements.
Why never a metal blade or a scouring pad?
Clear coat is a few hundredths of a millimetre thick. A metal blade cuts through it before you notice, and a scouring pad leaves a matt haze that only polishing removes. Plastic tools are softer than the paint, so by definition they cannot cut into it. Finish the job with a paint cleaner and, if appropriate, a coat of wax, because the adhesive remover dissolves the existing wax layer along with the residue.
Removing double-sided tape from a wall
On a wall the surface is weaker than the adhesive – that is the heart of the problem. Paint and wallpaper bond to the wall with less force than the tape bonds to the paint. Pull straight outwards and you will inevitably take paint with you.
Painted wall: less heat than you would think
Use the hairdryer sparingly here, and from a greater distance. Emulsion and wall paints soften with heat and then release from the substrate all the more readily. Warm briefly, pull back slowly and flat straight away, and roll the residue off dry. If adhesive remains, do not reach for solvent: it dissolves the paint too. A slightly damp cloth and patience give the better result.
Wallpaper: accept the damage or prevent it
On wallpaper, double-sided tape can rarely be removed without a trace, and heat or water only make things worse. Pull extremely slowly and as flat as you can; if paper starts to come with it, stop and cut the tape off at the edge, keeping the damage to the area you were going to repair anyway.
How do you avoid wall damage next time?
Apply a strip of painter's tape or paper tape to the wall first, then put the double-sided tape on top of it. The bond between the two tapes is strong enough for light objects, but on removal the painter's tape releases cleanly from the paint. For objects you want to take down regularly, Velcro® hook and loop tape is a better choice than tape: it opens and closes many times over.

per 1 Pieces
Narrow for thin cables Cut the length yourself Reusable, glue-free 
per 25 Pieces
Reusable hook-and-loop 20 x 200 mm, 25 pcs No adhesive or buckle 

per 1 Pieces
1 Roll UV-resistant No glue residues 

per 30 Pieces
Professional masking tape Strong quality Affordable price Glass, mirrors and windows
Glass is the most forgiving surface there is: hard, smooth and completely closed, so the adhesive has nothing to key into. Nothing here needs forcing.
Why does warm soapy water work so well on glass?
Warm water brings the adhesive above its softening point, after which the washing-up liquid creeps in between adhesive and glass as a surfactant. The bond is broken from underneath rather than torn away. Lay a wet cloth on the tape for a few minutes, then pull it back flat and push the remainder away with a glass scraper held at roughly 30 degrees. Anything still clinging goes with methylated spirits or glass cleaner.
When should you not use a scraper on glass?
On coated, tinted or film-backed glass, and on car windows with a heating grid or aerial wires. Those layers sit at the surface and one pass with a blade destroys them. There, work only with soapy water, plastic and patience.
Plastics, wood and coated panels
Why acetone ruins plastic
Acetone, thinner and nail polish remover are aggressive solvents. On amorphous plastics such as polycarbonate, ABS and acrylic they penetrate the polymer structure and cause stress crazing: a network of hairline cracks that leaves the material permanently cloudy and brittle. The effect often only appears a day later, when it is too late. On plastics, use isopropyl alcohol instead – it evaporates faster and does not attack the structure – or simply diluted washing-up liquid.
Wood: the finish is the vulnerable part
On painted or veneered wood it is not the wood but the coating that is at risk. Heat briefly, use plastic tools and dry immediately afterwards. On untreated or oiled wood the adhesive soaks into the grain; there, light sanding along the grain followed by re-oiling is usually the quickest route.
The mistakes we see most often
- Pulling straight outwards. The peel angle does more for the result than the force: folding back flat visibly reduces damage.
- Pulling too fast. The higher the speed, the stiffer the adhesive behaves and the sooner it fractures instead of stretching.
- Reaching for solvent immediately. Rolling off dry often removes the bulk and saves a risky treatment.
- Using metal tools. One slip on paint or glass cannot be undone without polishing or replacement.
- Not testing first. A product that is safe on one surface attacks another.
- Heat on wallpaper. Heat softens the adhesive, but it also weakens the paper layer – and that is what tears first.
- Choosing the wrong tape. Permanent tape on a temporary application is the single most common cause of all the work above.
Can I reuse double-sided tape?
No. Once an adhesive layer has been pulled off it has picked up dirt, dust and fibres, and the smooth contact layer has been disturbed; the bond you are left with is a fraction of the original. For applications you want to open and close repeatedly, choose a reusable fastening such as hook and loop tape rather than adhesive tape. Removed tape belongs with general waste; because of the adhesive layer it cannot be recycled with film or paper.
Prevent the problem: choose the right tape up front
The easiest removal job is the one you never have to do. So decide before application whether the bond needs to be permanent or temporary, and choose your double-sided tape accordingly.
High tack or low tack?
| Application | Tack level needed | Suitable construction | Removal later |
|---|---|---|---|
| Displays, posters, temporary signage | Low tack | Tissue carrier, removable adhesive | Straightforward, little to no residue |
| Carpet and carpet tiles | Medium to high tack | Cloth or scrim carrier | Heat required, residue likely |
| Mounting panels and profiles | High tack | Foam carrier | Demanding; saw with line, then roll off |
| Sealing boxes without a visible seam | Medium tack | Thin tissue or film tape | Not applicable, stays in place |
| Outdoor use with UV and moisture | High tack, acrylic | Film or foam carrier | Bonds harder over time, plan for heat |
Which other tapes belong on the shelf?
A well-stocked tape shelf is what stops the wrong tape being used out of necessity. For sealing boxes, use packaging tape, or machine tape if you run a case sealer. Duct tape is there for repairs and temporary fixing, construction tape for work on site, filament tape for bundling heavy goods and strapping tape for securing pallets and bundles. To make your shipments recognisable, printed tape is a strong choice, and for clean masking and bundling take a look at Nichiban® tape. If you handle rolls all day, a good tape dispenser repays itself quickly in comfort and speed. The full overview is in our tape category.
 18 Rolls per box Strong adhesion 50mm x 50mtr


per 36 Pieces
Strong packaging tape Tear-resistant Full box 

per 1 Pieces
Cheap enough for every bench Light at just 0.5 kg Takes PP, PVC and paper tape 
per 1 Pieces
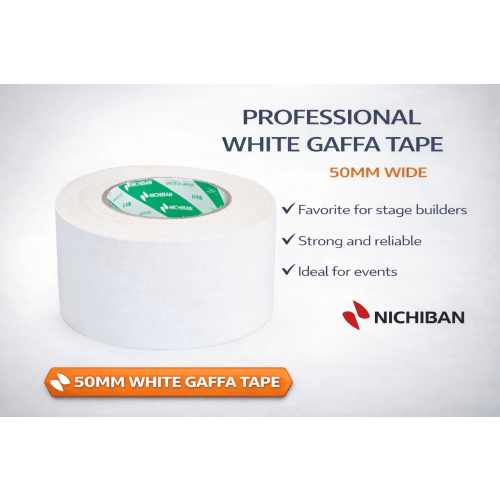
Leaves no adhesive residue Strong cloth backing (NT1200) Writable for marking and labelling In summary: the key choices
- Heat before force – warm makes the adhesive stretchy, hot damages the surface.
- Fold back flat, do not pull up – the peel angle decides whether the paint comes with it.
- Work slowly – fast pulls make the adhesive fracture instead of stretch.
- Plastic tools – never metal on paint, glass or plastic.
- Roll off dry first, then use a product – and always test that product on an inconspicuous spot.
- Acetone is not an option on plastics – isopropyl alcohol or diluted washing-up liquid is.
- Choose on tack level up front – temporary work needs low tack, mounting work needs high tack.
Ordering from Kortpack
Ordered on working days before 3:30 PM? Then your order will be shipped the same day. Enjoy free delivery on orders over €75 excl. VAT. Alongside tape you will also find protective and filling materials and cardboard boxes with us, so you can complete your packing line in one go.
Do you have questions about which size of double-sided tape is best suited to your situation? Please don't hesitate to contact us — by phone on +31 184 – 614256, via info@kortpack.nl or via WhatsApp.
 Den Webshop auf Deutsch ansehen
 View the webshop in English
 Ver la tienda online en Español
 Voir la boutique en ligne en Français
 Visualizza il negozio online in Italiano
 Bekijk de webshop in het Nederlands