

 Free gifts with orders of €150 or more



 Loading...
Preparation: what to do before the first length
Laying floor protection takes half an hour. Preparing badly costs you that half hour twice, because a runner on a dusty or damp floor will not stay put and will not protect. Count on four preparatory steps before you open the first roll from the floor protectors range.
Clean and dry the floor
Vacuum the floor free of dust and sweep away sand, grit and concrete debris. This is not cosmetic: a grain of sand under a runner acts like sandpaper the moment somebody walks over it, and can damage a lacquered or oiled floor within a day. On a floor you have just mopped yourself, wait until it is visibly dry – trapped mop water leaves the same staining as trapped construction moisture.
Check whether the floor can take it yet
A fresh screed, a newly poured floor or freshly applied levelling compound gives off moisture for weeks. Cover it with material coated on both sides and that moisture has nowhere to go. Wait to cover until the floor is measurably dry, or choose an open, vapour-permeable material. When in doubt, waiting a day beats having a screed cored out.
Set the route and measure up
Walk the route you will actually use during the job: from the front door to the work area, past the point where the bucket or the tools will stand. Protecting what gets walked on takes priority over covering a room completely. Then measure the length in runs and add a metre per run for the start and the trim at the end.
Lay out your tools
You need no more than this: a tape measure, a sharp snap-off knife with a fresh blade, a straight batten or rule to cut against, and tape. To join the seams and finish along the skirting board, use a tape that lifts without residue, such as masking tape or the orange removable PVC tape of 50 mm x 33 metres. The latter has two advantages on site: it grips even on dusty surfaces, and the signal colour makes the route immediately visible to anyone walking in.
Let the material acclimatise
A roll straight out of a cold van or an unheated store is stiffer than a roll at room temperature. Film and felt then unroll poorly and spring back at the edges. Bring the roll inside half an hour before you start; it makes a noticeable difference to getting the runs flat.

per 1 Pieces
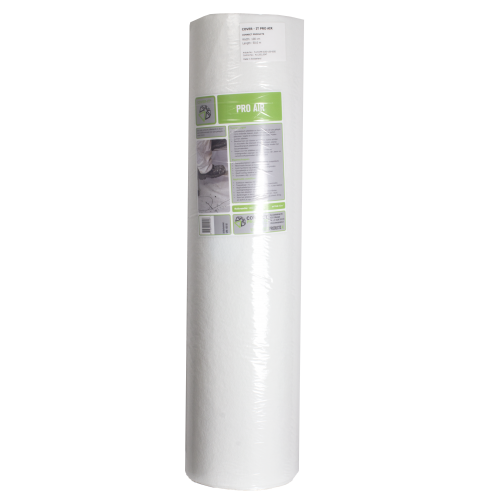
 Floor protection Different surfaces 50 m² per roll
per 1 Pieces
Breathable membrane For fresh floors 50 m² per roll 
per 1 Pieces
Self-adhesive on carpet Anti-slip and liquid-tight 42 m² per roll 
per 1 Pieces
For small jobs Anti-slip layer Good protection 
per 1 Pieces
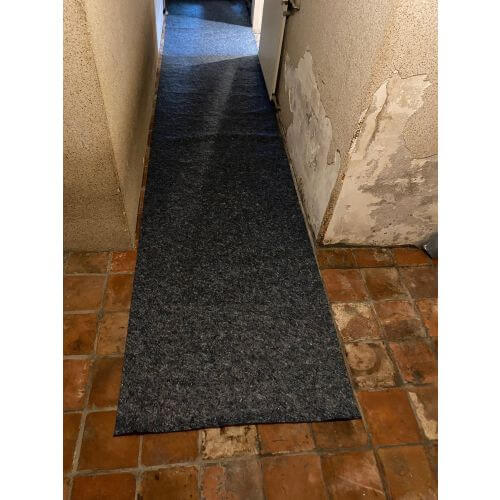
For soft and hard floors 240 g/m² felt 10 m² per roll 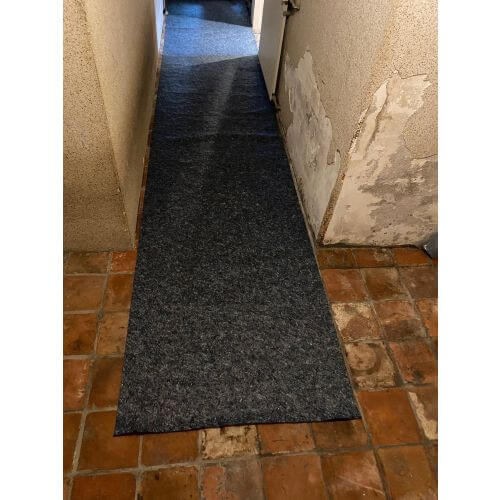
per 1 Pieces
XL: 25 m² per roll 240 g/m² felt Soft and hard 

per 1 Pieces
280 g/m² runner Moisture- and wear-proof FSC, 100% recyclable 
per 1 Pieces
For hard/lacquered floors Self-adhesive, no residue 42 m² per roll 
 Liquid-tight and anti-slip Soft and hard floors 50 m² per roll
Rolling it out: step by step
Step 1: start at the furthest point
Always work from the far corner towards the exit, so you never have to walk back over lengths you have just laid. In a hallway that means starting at the end of the hall and finishing at the door.
Step 2: roll out in the direction of travel
Lay the run in the same direction as the traffic over it. A seam running across the direction of travel gets lifted with every step and lets go within a day; a seam running with the traffic gets pressed down instead. With a wheelbarrow or sack truck the difference is bigger still, because a wheel literally shoves a cross seam open.
Step 3: keep the right overlap
Do not butt the second run against the first – lay it over. Five centimetres is enough for dry work; for wet work keep ten. Make sure the upper run lies on the side the moisture comes from: water running across the seam then travels over the overlap instead of under it.
Step 4: tape the seam along its full length
A few strips every ten metres is not enough. Close the seam over its whole length and press the tape down with your thumb, especially on the first and last metre. Those are the spots where somebody lifts the run with a toecap on the way in.
Step 5: finish the edges at the skirting
Run the protection right up to the skirting board and fix it there with tape onto the skirting, not onto the floor. That closes the gap plaster water and splashes head straight for, without taping the floor itself. If the run stops ten centimetres short, you have left the hardest strip to clean completely unprotected.
Step 6: cut obstacles out neatly
Radiator pipes, thresholds and floor drains should be cut out rather than worked around. Lay the run over the obstacle, press it down so the outline shows, and cut against a straight batten. Always cut one to two centimetres tight, so the material closes snugly around the penetration, and finish the cut with a piece of tape.
Overlap, fixing and removal by material
Not every material is laid the same way. The table below shows, per type, which side goes up, how much overlap to keep, how to fix it and what to watch when taking it up.
| Material | Which side up | Overlap | Fixing | Maximum time down | Watch when removing |
|---|---|---|---|---|---|
| Cardboard runner (280 gsm) | Either – coated both sides | 5 – 10 cm | Tape at seams and skirting | Duration of the job, if the floor has cured | Roll the cardboard up again, do not fold: a crease becomes a tear |
| Felt runner with PE coating (240 gsm) | Felt up, PE layer down | 5 cm | Usually stays put on its anti-slip layer; still tape the seams | No practical limit | Shake it out before rolling, or grit travels to the next job |
| Absorbent non-woven (110 – 180 gsm) | Absorbent side up, liquid-tight layer down | 10 cm for wet work | Tape at seams, edges and thresholds | No practical limit | Let saturated sections dry before rolling up |
| Self-adhesive protective film | Adhesive side to the floor, anti-slip top up | 2 – 5 cm | Self-adhesive; no extra tape on the floor needed | Around 2 months | Pull back at a shallow angle, not straight up |
| Transparent construction sheeting | Either | 20 cm or more | Tape at seams and edges; do not walk on it | Duration of the job | Mop up water in the folds first, or you pour it over the floor |
Which side actually goes up?
With the cardboard runner it makes no difference: it has a waterproof PE coating on both sides, so whichever way you lay it you get the same protection. With a felt runner it is different: the PE coating belongs face down, against the floor. That layer holds the moisture back and provides the anti-slip effect. Lay it the other way up and the felt soaks through while the run also slides away. With absorbent non-woven such as Cover-it® Super the same rule applies: soft absorbent side up, smooth liquid-tight layer to the floor.
How much overlap is enough?
Five centimetres for dry work, ten for wet, and twenty or more for sheeting. The logic: the smoother and thinner the material, the more easily the overlap shifts under load, so the more margin you need. With self-adhesive film two to five centimetres will do, because the run cannot move. If the floor is in a room that sees a lot of water, such as a bathroom under renovation, a wider run always beats more seams: consider sheeting at 400 cm or 600 cm wide as an underlayer.
Special situations
Protecting a staircase
On a staircase a loose runner falls off. Cardboard will not stay on the nosing and forms a trip edge into the bargain. Use self-adhesive covering film here: work top to bottom, press it down tread by tread, and work the nosing round rather than pulling it taut over the edge. Nick the film at each tread so it follows the corner without leaving an air bubble. A bubble on a tread is exactly where somebody in smooth-soled boots goes over.
Doorways and thresholds
Run the protection past the threshold, about twenty centimetres into each room. Fix it there with an extra cross strip across the full width. The threshold is where most foot traffic turns, so that is where the run takes the greatest sideways force. If a door has to open and close, check it still clears the material – a felt runner a few millimetres thick can already bind on a closely hung door.
Rooms with a lot of moisture
In a bathroom or kitchen under renovation, work in two layers: transparent protective film or sheeting as a moisture barrier across the full width, and an absorbent run on top along the route. The film holds the moisture back, the non-woven keeps you standing dry. Never walk directly on the sheeting: the moment water sits on it, it is treacherous.
On carpet and soft floors
On carpet you do not need to tape anything, because self-adhesive film is the only material here that stays put. Roll it out in one movement and press it down with a flat hand or a floor roller in the direction of the pile. Do not work against the pile: air stays trapped underneath and the adhesive keys poorly.
Large open spaces
In a hall or showroom several metres wide, it pays not to lay every run in the same direction but in blocks, one per route. You use less material and keep the seams out of the zones with the heaviest traffic. For the areas nobody walks on, covering with sheeting or a tarpaulin is enough.
During the job: keeping it down
Check the seams daily
Take a minute at the start of each working day to check the seams and the edges by the doors. A lifted corner then costs you a piece of tape; the same corner after three days costs you a clean-up. So keep the roll of tape on site rather than in the van.
What to do about a tear or a saturated patch
Repair a tear by laying a piece of the same material over it with generous overlap and taping right around. Do not simply tape it shut: tape carries no load and splits open in the same place. If a non-woven run is completely saturated, replace that section. Saturated non-woven simply gives the moisture back to the floor under pressure.
Can you take a mobile tower over the runner?
Over a cardboard runner yes, provided the floor beneath has cured: 280 gsm cardboard is made precisely to spread point loads. Over felt and non-woven it also works, but do not park the tower on a seam, because that is where the wheel pushes the overlap open. Over sheeting and self-adhesive film, do not: those tear under a steel wheel. If you move heavy equipment regularly along the same route, add a second layer of cardboard along that stretch.
Removal and disposal
In what order do you take it up?
Work in reverse order of laying: first the tape on skirtings and thresholds, then the seams, then the runs themselves. Roll each run towards you with the dirty side inwards. That keeps the dust in the roll rather than blowing it over the floor you have just handed over.
How do you avoid adhesive residue?
With self-adhesive protective film there are three rules. Stay within the recommended service life of around two months. Pull the film back at a shallow angle, almost along the floor, rather than lifting it straight up – that lets the acrylic adhesive release evenly. And work at room temperature: cold adhesive splits and leaves islands behind, warm adhesive stretches and comes away with the film. The same principle applies to tape: shallow angle, steady pull, never a sharp yank.
What do you do with the used runner?
Cardboard runners with a PE coating do not belong in clean waste paper but in commercial waste, unless your waste contractor has a separate stream for coated board. Sheeting and self-adhesive film go with plastic film waste, provided they are not soaked with plaster or paint. Felt and non-woven runs that are still intact can be rolled up and taken to the next job. If they have gone stiff with dried plaster or paint, replacing beats reusing: a stiff run is rough, more slippery and no longer takes up moisture.
In short
- Prepare: floor dust-free and dry, route decided, material acclimatised.
- Lay: from the far corner towards the door, in the direction of travel, correct side up.
- Seams: 5 cm overlap for dry work, 10 cm for wet, taped along the full length.
- Edges: run up to the skirting and fix onto the skirting, not onto the floor.
- Stairs: self-adhesive film, nicked at each tread with the nosing worked round.
- Removal: reverse order, roll up dirty side inwards, pull film back at a shallow angle.
Everything for the job at Kortpack
Alongside floor covering you will also find what goes with it: protective film for windows and frames, furniture covers and moving blankets for the furniture, plastic corner protectors for vulnerable edges, and the accessories you need while the work is on. Ordered on working days before 3:30 PM? Then your order will be shipped the same day. Enjoy free delivery on orders over €75 excl. VAT.
Do you have questions about which size of floor protectors is best suited to your situation? Please don't hesitate to contact us — by phone on +31 184 – 614256, via info@kortpack.nl or via WhatsApp.
 Den Webshop auf Deutsch ansehen
 View the webshop in English
 Ver la tienda online en Español
 Voir la boutique en ligne en Français
 Visualizza il negozio online in Italiano
 Bekijk de webshop in het Nederlands